Inserting Pictures on Forms
In ATX, you can add a picture or image to a form. For example, you can save your signature as an image file, add it to the 1040 Preparer section, and save this as a Customized Master that can be used for all your returns. See Customizing Master Forms.
The application supports the .bmp, .gif, .jpg, and .png image formats. Once added to a form, the image will be printed (both physically and in PDF form) as an integrated part of the form.
The Insert Picture menu item will appear disabled on certain forms that are write-protected by the taxing agency.
Inserting a Picture
To add a picture to a form:
- Open the form to the page/worksheet where you want to add the picture.
- From the Edit menu; then, select Insert Picture.
The cursor becomes a large + symbol.
- Drag and drop the cursor in the field where you want to insert the picture.
A Windows Open dialog box appears.
- Navigate to the location of the image/picture file; then, click Open.
The image appears on the form.
- To adjust the image, click to first select it. The selected image has blue squares surrounding the image.
- Do either or both of the following, depending on how you want the image placed on the form:
- To resize it, click the corner of the image, and drag in or out on a diagonal.
- To move it, click in the middle of the image; then, drag the whole image to its location.

Example of inserted picture (of signature)
The image is saved with the form when you save the return.
Removing a Picture
To remove a picture from a form:
- Click the picture in the form to select it.
- Do one of the following:
- Click the Edit menu; then, select Remove Picture.
- Press the Delete key.

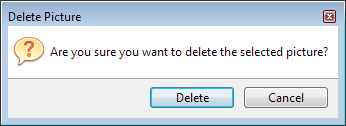
Delete Picture message
- Click Delete.
See Also: